stein

stein

Monday, June 23, 2014

Berliner-weiss


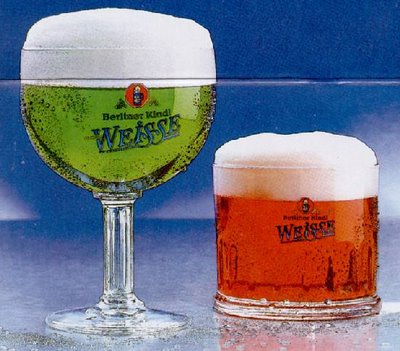
This is the first of what I am sure will be many post about our berliner-weiss.  Berliner-weiss is a sour wheat beer that some people add syrup to after it is poured into a glass.  I am assuming that glass in the picture above, the green beer is apple syrup and the red is raspberry syrup.  I have tried both along with vanilla, all are yummy.

Sour beers are becoming more popular in the US.   I think part of this is because many of the microbreweries want a challenge, I will get in to this latter on.    The other reason for the rise of the sour beers is that, they are apparently more appealing to women.  I can kinda see where that is coming from.  Too many american breweries are obsessed with hops.   Even traditional styles that should have little to no hops,  are crammed with hops.  As a generalizations, most women don't like IPAs or other hoppy beers.

The reason why sours are fun is because they are a challenge.  For sour beers, both yeast and a bacteria fermenting sugars to alcohol. The reason why sour beers have a higher alcohol content is because, bacteria can use sugars that yeast can not and bacteria can thrive in a high alcohol enviroment.  The other issue is the same bacteria that you use for souring a beer is the same bacteria that can spoil your beer.  That is why some breweries do not make sour beers or the bacteria fermentation takes place off site.

Usually for sour beers there are two separate fermentations, first yeast then bacteria.  The yeast will have a long fermentation time of a month, and then bacteria will then ferment the beer for three months.   For a berliner-weiss both fermentations take place at the same time, so the total fermentation time is two to three weeks, which is a lot better than four months.


The picture about is the starter for our bacteria, Lactobacillus acidophilus.  The yeast can out compete the bacteria for sugars, it is because that there needs to be more bacteria than yeast at the beginning of the fermentation.  We made a starter mixture of apple juice, honey and 'brewers nutrients'.    L. acidophilus is the same bacteria found in yogurt.  It's perfectly happy growing at high temperatures which is nice because it excludes other things from growing in the bottle. Placing the slow cooker on warm kept the culture at 100-120F.  The bacteria culture grew for a week before we started brewing.


The bacteria bottle was cooled to 80F and then the yeast was added.  After three hours the bacteria/yeast mixture was added to the fermenter.  Three hours after that there was a ton of activity.   I think the yeast fermentation should be done in a week and a half, which leave a few days for the bacteria to ferment on it's own.  We will test the beer in two weeks. 


Monday, June 16, 2014

The Reinheitsgebot loophole

We've had a busy month or so, but we're back on track.  We took about a two week break from brewing and haven't had much time to update the website.  But on to the thing we care about most...beer.

Our Hefeweizen turned out pretty amazingly.  We took the Speise and boiled it once it had melted from being in the freezer and used it to prime the beer.  We also named the beer Loophole beer based on the reason wheat beers even existed in spite of the Reinheitsgebot.  I discovered the loophole when researching about the history of Hefeweizen to give me an idea what to name it, and just for general edification.  This website is where I found a majority of my information: http://www.beerboozebites.com/2008/12/13/a-brief-history-of-hefeweizen/

In honor of the naming, we also used the coat of arms of the Dukes involved with the loophole in question:

What I find so interesting is that the Reinheitsgebot only had three ingredients it allowed for; Barley, Water, and Hops.  Yeast was not known about at that time so they did not include it until years later.  But the Wheat was allowed through select breweries as the Dukes of Wittlesbach were extremely fond of Weissbier.  The original Reinheitsgebot was actually created for two reasons that I've ever learned of.  One reason was economical in order to ensure that not all grains were used for the creation of beer, and plenty were used for food in order to help regulate cost.  The second reason was to stop the use of certain preservatives that some breweries were experimenting with to help their cost and, from what I've been able to gather from a few sources, caused some bad side effects.

As a side note, if you can find any beers by Dr. Fritz Briem I highly recommend buying them.  He is apparently a professor at the University of Munich and made a series of beers based on old German recipes which are either uncommon nowadays or just not made at all.  Because of him I finally was able to try a Berliner Weiss (a beer we are currently brewing and I will have a special post for), and a beer called Grut Beer which uses many spices and is a recipe from before the Reinheitsgebot.

Bitter Brit aka don't photo bomb our friends


The Biter Brit batch was a copy cat of 21st Amendment  Bitter American:


For beers that that should have a lighter color an flavor the mash should be placed in the pot once the water has reached temperature.  We start our boil with placing the mash in the pot and then increasing the temperature for the brewing. Our beer did not exactly match 21st Amendment because we boiled that mash longer, but that is ok.  The additional flavors from having a longer boil balanced the bitterness of the hops.   


Now about the label.  Our friend Monica was in Europe for work.  While she was in London she took a selfie in front of Big Ben.  When she posted her picture on facebook a couple of her friends started making fun of the obviously upset British gentleman in the background.   Since she was going to be out here so we named a beer in her honor.

Sunday, May 4, 2014

The Speise must flow

I wanted to wait a bit before doing this post as the American Bitter brew was a little more involved time wise than most brews.  This is because while the brew itself was very basic, a week later we had to do a technique called "dry hopping".  Dry hopping is actually extremely easy and only means you threw hops into the fermenter after it had been fermenting for a bit.  Specifically, we still used hops during the brew, but a week later we took two of the hops packets, listed below, and put those in a nylon mesh bag to place into the fermenter.  We've never done this before so we did a bit of reading ahead of time to make sure we did it right.  The act of placing it is obviously not difficult, but we wanted to make sure we got the timing down, as well as determining whether we should move to a 2nd fermenter yet.  We have determined that we will be moving it to a 2nd fermenter next weekend.  The ingredients for this brew were:

Grains:
1lb Munich
8oz Crystal 15L
8oz Crystal 40L

Hops:
1oz Cascade (Bittering Hops boiled for 90 minutes)
1oz Liberty (Flavoring Hops boiled the last 15 minutes)
1oz Cascade (Aroma Hops boiled the last 1 minute)

1oz Cascade and 1oz Willamette (Both hops added to fermenter after 7 days.  Transfer after 3-7 days of Dry Hopping)

We have also bottled our Porter, which we have now labeled Night Porter.  The label we made is down below using an image I really liked that someone drew of a zombie doorman.


Now, the thing I have been most excited about, we finally brewed a traditional German Hefeweizen.  The guy at the homebrewing shop was about to sell us a kit which was not traditional at all and used extract even.  Fortunately, Kristi knew to get the grains specifically.  The guy at the shop knew exactly what we needed and helped Kristi put together the grains bag filled with traditional Bavarian Wheat.  Now, a traditional Hefeweizen is apparently 50% wheat and 50% barley, these seemed to be indicated by the 6lb White Wheat and the 4lb 2-Row.  For the hops we used German hops (named such), and we used a large bag for the grains again.  This time we used clips to keep the bag leveled high enough so the bottom of the bag did not touch the bottom of the pot, thereby burning it and causing it to rip open like had happened to us previously.  This worked out well and when we took the grains out it was not too much of a hassle, and we placed the hops in when it returned to a boil.  Here is where things actually differ from your average brew.

When I was researching a traditional German Hefeweizen, I wanted to make sure we used a traditional priming sugar.  What I discovered was something called Speise.  Speise, German for food, is the sweet wort from the brew itself.  What we did was, after taking the grains out and before turning the heat back on and placing the hops in, we drained out the appropriate volume of liquid using a hose attached at the base of the pot.  This container is now being stored in our freezer (once it cooled off enough that it wouldn't burst from the temperature difference).  The reason to use Speise, and one of the reasons I was so interested in using it, is that you are using the brew itself before the sugars were converted into alcohol (not to mention before adding hops) and you are not changing the flavor profile of your beer by using the same sugars that made it in the first place.  To calculate how much Speise you should keep, we found this equation: (12*number of gallons)/((Specific Gravity - 1)*1000).  Now, generally speaking, we always use 5 gallons so our numerator will be 60.  We were not clear which Specific Gravity they wanted, but they seemed to indicate the wort itself, however that would be difficult with how hot it was and we wanted to know how much to take at that given moment so I looked up the average expected Specific Gravity and found it is 1.046.  With these numbers we ended up with 1.3 quarts of Speise drained.

Thursday, April 24, 2014

Pecan Ale


While I was working in Atlanta last summer I discover Southern Pecan Ale.  It's an english style nut ale with pecans.  I brought some home in my suitcase and it was a big hit with many of my friends. The brewery, Lazy Magnolia, does not distribute outside the south.

I found the following copy cat recipe online:

Pale Ale Malt 8.5 lbs
Caramel Malt 1.5 lbs
Carapils Malt 0.5 lbs
Wheat Malt    0.5 lbs
Belgian Special B 0.5
Rosted Pecan 10 oz
Willamette hops 1 oz 1/2 for bittering 30 min 1/2 aroma 1 min 
White labs english ale yeast

This was an all grain recipe which we have not done before.  All of that adds up to 12 lbs of grains. The bag that held all of the grains burned during the boil.  We lost over a gallon of water in the grain bag.   

Fermentation was very active to the point that a few times the lid popped off.   

Tasting the ale while bottling I could taste some of the pecan but not as much as I wanted.  I found two recipes on line.  One said the to include the pecans in the mash, while  the other had a 60 min boil. 

We used dark corn syrup for the priming sugar for bottling because it is one of the main ingredients in pecan pie.

The Pecan ale was named Drunken Squirrel, because that is the best we could come up with.  Here is the label.


Here is the recipe that will be used next time 

Pale Ale Malt  7.5 lbs
Caramel Malt 1.5 lbs
Carapils Malt 0.5 lbs
Wheat Malt    0.5 lbs
Belgian Special B 1.5
Rosted Pecan 20 oz (Boil along with the bittering hops)
Target hops 1 oz 1/2 30 min for bittering 1/2 aroma 1 min
White labs english ale yeast

Lazy Magnolia has Southern gentleman which is basically the pecan nut ale aged in oak bourbon barrels.  So we might try using oak bourbon cubes. 


The beginnings of Porters

We've finally decided to start with a Porter which I have been looking forward to doing for a while now.  Unfortunately, they did not have the basic ingredients for your standard Porter so we had to use a copycat from Heretic Brewing called Shallow Grave.  We'll see how it turns out though.

For those that might be curious as to the reason I title this post "The beginnings of Porters", it's because Porters actually come in different types.  Now, a Porter itself is an Ale, which means it is top fermentation, but a strong Porter is what is commonly known as a Stout.  Then from there you have Imperial Stouts and so on.  So I wanted to try to understand what exactly divides up the different variants so when I start doing more custom brews I can determine what I'll need and why.

While brewing we ran into a snag, however.  When I quickly turned off the temperature once it hit boiling, in order to allow the wort to calm down and not boil over, I didn't realize the flame had not relit like it normally does.  Because of this we lost a lot of heat and had to rush to get the heat back up and fast.  Now, the only real thing we can do to help facilitate this with our setup is putting the lid on and hoping it traps enough heat within.

We did eventually get the heat up and we tried to boil it for longer to make up for the lost time, but it will be hard to know until we get further in the fermentation process.  At this time it has been a week since we brewed and the yeast has been going crazy, so we're hoping that is a good sign.  If worse comes to worse I just remember a story I was told once by someone whose son had taken up homebrewing.  They had brewed a Stout and it had turned out bad, so no one drank it, but they forgot about it for a year then figured what they hey and popped them open.  What they found was that the extra time in the bottle had mellowed out the bad taste and given it a more chocolatey taste which everyone enjoyed.  So just remember, when in doubt, just wait longer.

Saturday, April 5, 2014

Extremely delayed post

Man, time flew and I didn't realize I never posted about the Red Kolsch.  Honestly there wasn't much to tell as it's exactly like the Kolsch with some of the malts we saw in the Irish Red.  That being said, we found the Wheat beer was ready way ahead of schedule.

The Wheat seemed to zoom through the fermentation and bottling process and just finish fermenting early.  Because it was fermented in warm temperatures that apparently gives it a banana note, whereas cold would give clove notes.  It's very refreshing and we called it our Scarecrow Wheat.

If we haven't mentioned before, we have been naming all of our beers.  I've convinced Kristi to eventually post about our naming and pictures of the labels.  So hopefully she'll post that soon.  Kristi has said she plans on posting her recipe for the Pecan beer we brewed tonight based on a beer she tried from a microbrew in Mississippi, though she had it while in Georgia.  Because this was Kristi's pick and she was really excited about it she wanted to be the one to post about it so I'll leave that up to her.  But I will note we had to get a large nylon mesh bag for holding all the grains.  Apparently if you use pure grains you then aren't using malt extract, but it's a lot more difficult to handle for brewing as we found.  I'll let Kristi fill you all in on that.

I'm working on a recipe for our next beer to brew that is going to be mine.  This was the beer I was talking about using local ingredients, and I think I'm going to try to make a California Lager as you apparently can brew it like an ale, it just needs to store for a long time (hence lager).